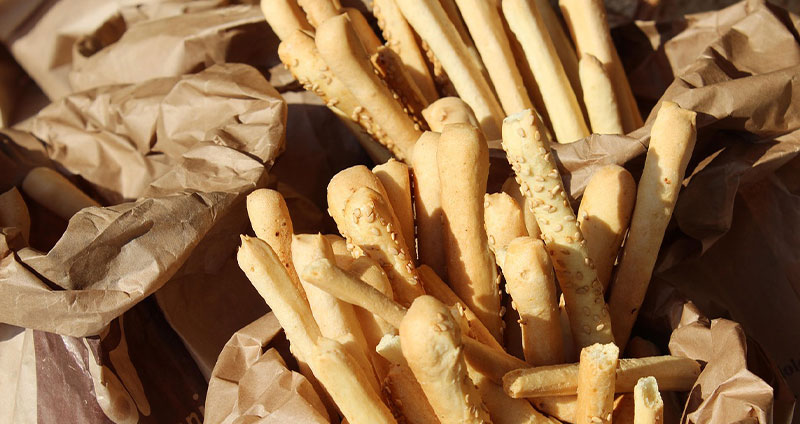
Grissini, the iconic Italian breadstick, is one of those simple pleasures that perfectly embodies the Italian approach to food: take a few quality ingredients, treat them with respect, and create something extraordinary. These slender, crispy sticks are the perfect choice when you crave light, crunchy bites. They can be served as an appetizer, as a companion to dips, or simply as a sophisticated snack. The best part? You can easily make them at home, and once you do, you’ll never want to buy the commercial versions again!
The Story Behind the Stick
Grissini originated in Turin, Italy, in the late 17th century. Legend has it that they were created for the Duke of Savoy, Vittorio Amedeo II, who as a child had digestive problems and couldn’t tolerate regular bread. The court baker, Antonio Brunero, developed these thin, crispy breadsticks that were easier to digest. The young duke loved them, and soon grissini became a staple throughout the Piedmont region and eventually all of Italy.
Napoleon Bonaparte was reportedly so fond of grissini that he had them delivered regularly from Turin to Paris, calling them “les petits bâtons de Turin” (the little sticks of Turin). This aristocratic endorsement helped spread grissini’s popularity throughout Europe.
Today, grissini come in countless variations – some thick and soft, others thin and crispy, flavored with everything from rosemary to olives. But the fundamental appeal remains the same: they’re irresistibly crunchy, endlessly versatile, and deeply satisfying to both make and eat.

Traditional Grissini Recipe
Let’s start with the classic version that uses commercial yeast. This recipe is perfect for beginners and produces consistently excellent results.
Ingredients (makes approximately 25-30 breadsticks):
- 500g (4 cups) all-purpose flour or bread flour
- 7g (2¼ teaspoons) active dry yeast (or 25g / 1 oz fresh yeast)
- 1 teaspoon salt
- 1 teaspoon sugar
- 3 tablespoons extra virgin olive oil
- 300ml (1¼ cups) lukewarm water
- Flavoring options: dried oregano, rosemary, sesame seeds, poppy seeds, or sea salt
Detailed Instructions:
1. Activating the Yeast If you’re using fresh yeast, crumble it into the lukewarm water and add the sugar. Let it sit for 5-10 minutes until it becomes foamy and active. This foaming is crucial – it’s your confirmation that the yeast is alive and ready to work its magic. If you’re using active dry yeast, you can add it directly to the flour, though proofing it first ensures better results and lets you verify the yeast is viable.
The water temperature is critical: it should be lukewarm, around 38-40°C (100-105°F). Too hot and you’ll kill the yeast; too cold and it won’t activate properly. A good test is to put a drop on your wrist – it should feel comfortably warm, like baby bath water.
2. Making the Dough In a large bowl, combine the flour and salt. Mix thoroughly – this ensures even salt distribution, which is important because salt can inhibit yeast if they come into direct contact. Make a well in the center and add the yeast mixture (fresh or dried), olive oil, and lukewarm water.
Begin mixing with a wooden spoon or your hands, bringing the flour from the edges into the center. As it comes together, turn it out onto a lightly floured surface and knead. Knead for about 8-10 minutes until you have a soft, smooth, elastic dough that’s not sticky. The dough should be tacky but shouldn’t stick to your hands. If it’s too sticky, add flour a tablespoon at a time. If it’s too dry, add water a teaspoon at a time.
Proper kneading develops the gluten network that gives grissini their characteristic texture. You’ll know it’s ready when the dough is smooth, elastic, and when you poke it with your finger, it springs back slowly.
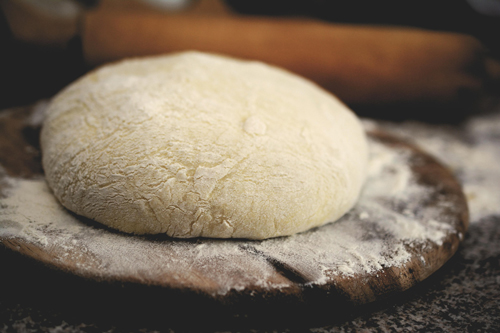
3. First Rise Form the dough into a ball and place it in a lightly oiled bowl, turning once to coat the surface with oil. Cover with a clean kitchen towel or plastic wrap and let it rise in a warm place for about 1 hour, or until doubled in size.
A warm place is key – around 24-27°C (75-80°F) is ideal. In winter, you can create a warm environment by turning on your oven for just a minute, turning it off, and placing the bowl inside. Alternatively, place it near (but not on) a warm radiator, or in a sunny spot.
4. Shaping Once the dough has doubled, punch it down to release the gases. Turn it out onto a lightly floured surface and roll it out to about 1cm (½ inch) thick. The shape doesn’t matter much – you can roll it into a rectangle or a rough oval.
Cut the dough into long, thin strips about 1cm (½ inch) wide. You can use a pizza cutter, sharp knife, or bench scraper for this. Then comes the fun part: gently roll each strip between your hands or on the work surface to create long, thin sticks. They should be about as thick as a pencil. Don’t worry about making them perfectly uniform – the rustic, handmade look is part of their charm!
As you roll, you can stretch them to your desired length – traditionally anywhere from 20-30cm (8-12 inches) long. Some people prefer shorter, stubbier grissini; others like them long and elegant. Experiment to find your preference.
5. Flavoring (Optional) This is where you can get creative! Here are some classic options:
- Rosemary: Brush the shaped grissini lightly with olive oil and sprinkle with fresh or dried rosemary and a bit of coarse sea salt
- Sesame: Roll the sticks in sesame seeds (white, black, or mixed) before baking
- Everything seasoning: Combine sesame seeds, poppy seeds, dried garlic, dried onion, and salt
- Parmesan: Mix grated Parmesan into the dough or roll the shaped grissini in it
- Fennel: Brush with oil and sprinkle with fennel seeds and salt
- Spicy: Add red pepper flakes or cayenne pepper to the dough
6. Baking Place the grissini on a baking sheet lined with parchment paper, leaving a little space between each (they won’t spread much, but some space helps them crisp evenly). Bake in a preheated oven at 200°C (400°F) for 15-20 minutes, or until golden brown and crispy.
Watch them carefully toward the end of baking – they can go from perfect to burnt quickly. They should be evenly golden and make a hollow sound when tapped. For extra crispiness, you can turn off the oven and leave them inside for an additional 5-10 minutes to dry out completely.
7. Serving Let the grissini cool completely on a wire rack – they’ll crisp up even more as they cool. Serve with your favorite dips like pesto, hummus, baba ganoush, tapenade, or simply with good olive oil for dipping. They’re also perfect alongside antipasti platters, soups, or salads.
Sourdough Grissini Recipe – The Natural Alternative
For those who maintain a sourdough starter, making sourdough grissini takes this classic treat to another level. The sourdough version is not only crispy and flavorful but also more natural and healthier, as the sourdough enriches the flavors and aids digestion. The long fermentation breaks down some of the gluten and phytic acid, making the breadsticks more digestible and nutritious.
Ingredients (makes approximately 25-30 breadsticks):
- 500g (4 cups) all-purpose or bread flour
- 150g (⅔ cup) active sourdough starter (fed and bubbly)
- 1 teaspoon salt
- 1 teaspoon sugar or honey (to help the sourdough activity)
- 3 tablespoons extra virgin olive oil
- 200ml (¾ cup + 2 tablespoons) lukewarm water
- Flavoring options (optional): dried oregano, rosemary, sesame seeds, poppy seeds, or coarse sea salt
Detailed Instructions:
1. Preparing the Sourdough Starter Make sure your starter is active and freshly fed. For best results, feed it 4-6 hours before use so it’s strong, bubbly, and at its peak. You’ll know it’s ready when it has doubled in size, has a pleasant yeasty-sour aroma, and shows lots of bubbles on the surface and throughout.
If your starter has been in the refrigerator, take it out the night before, feed it, and let it come to room temperature and become active.
2. Mixing the Dough Sift the flour into a large bowl and mix in the salt. Add the sourdough starter, sugar or honey, olive oil, and lukewarm water. Mix together, then knead into an elastic dough. If the dough feels too dry, add a little more water, a teaspoon at a time. Sourdough tends to absorb water differently than commercial yeast dough, so be patient and adjust as needed.
Knead for about 10 minutes until the dough is smooth and elastic. The dough will feel slightly different from commercial yeast dough – it might be a bit stickier and less uniform at first, but that’s normal.
3. First Fermentation (Bulk Ferment) Place the dough in a lightly oiled bowl, cover with a kitchen towel, and let it rest at room temperature for 4-5 hours. This is where the magic happens – the wild yeast and bacteria in your starter are working to ferment the dough, developing complex flavors and breaking down the flour.
Halfway through (after about 2 hours), perform a stretch and fold: gently stretch the dough out, then fold it back on itself from all four sides. This strengthens the gluten structure without intensive kneading. You can do this 2-3 times during the bulk fermentation.
The dough won’t rise as dramatically as commercial yeast dough, but it should increase in size by about 50% and show visible bubbles on the surface.
4. Shaping Turn the fermented dough out onto a lightly floured surface and roll it out to about 1cm (½ inch) thick. Cut into long, thin strips about 1cm (½ inch) wide, then roll them into breadsticks. Shape them according to your preference – you can keep them straight, twist them, or even tie them into knots for a fun presentation.
Because sourdough is slightly stickier, you might find it helpful to lightly oil your hands while rolling the sticks. This prevents sticking and creates an even smoother surface.
5. Second Fermentation (Proofing) Place the shaped grissini on a parchment-lined baking sheet and let them rest for 1-2 hours. This second rise allows them to become even airier and develop more flavor. They won’t puff up dramatically – you’re looking for a slight increase in volume and a slightly puffy appearance.
During this time, the dough continues to ferment, developing the characteristic tangy flavor that makes sourdough special. If your kitchen is cool, this might take longer; if it’s warm, it might be faster.
6. Baking Preheat the oven to 200°C (400°F). Bake the grissini for 15-20 minutes, or until golden brown and crispy. Sourdough grissini may take slightly longer to achieve the perfect crispiness than their commercial yeast counterparts, so don’t be afraid to give them a few extra minutes if needed.
For professional results, you can create steam in the oven for the first few minutes of baking by placing a pan of hot water on the bottom rack. This helps develop a beautiful, crispy crust.
7. Serving Let the grissini cool completely before serving. Present them with your favorite dips – they’re particularly delicious with the basil cream cheese spread (recipe below), pesto, hummus, or herb-infused olive oil.

Storage and Make-Ahead Tips
Grissini are best enjoyed fresh, but they can be stored successfully:
- Room temperature: Store in an airtight container for up to 1 week. If they lose their crispiness, you can refresh them by baking at 180°C (350°F) for 3-5 minutes.
- Freezing: Grissini freeze beautifully. Cool completely, then store in freezer bags for up to 3 months. Thaw at room temperature and crisp in a warm oven before serving.
- Make-ahead dough: You can prepare the dough through the first rise, then refrigerate overnight. The next day, let it come to room temperature before shaping and baking. This cold fermentation actually enhances flavor.
Perfect Pairings
While grissini are delicious on their own, they truly shine when paired with complementary flavors:
Classic Italian Pairings:
- Wrapped in prosciutto or other Italian cured meats
- Served alongside a cheese board with soft cheeses like gorgonzola or aged ones like Parmigiano-Reggiano
- With olive tapenade or sun-dried tomato spread
- Alongside minestrone or ribollita soup
Modern Combinations:
- Dipped in warm spinach and artichoke dip
- With roasted red pepper hummus
- Alongside a charcuterie board
- With whipped feta and honey
- As a crudité replacement with your favorite vegetable dips
Sweet Variations: For a dessert twist, you can dip one end of baked, cooled grissini in melted chocolate (dark, milk, or white) and sprinkle with chopped nuts, coconut flakes, or sea salt. Let the chocolate set before serving. These make elegant accompaniments to coffee or dessert wine.
Basil Cream Cheese Spread – The Perfect Companion
Try these grissini with my favorite basil cream cheese spread! This quick and flavorful recipe creates the perfect dip for your homemade breadsticks.
Conclusion
Making grissini at home is more than just baking – it’s connecting with Italian culinary tradition, understanding the simple beauty of good ingredients, and creating something with your own hands that brings joy to your table. Whether you choose the quick commercial yeast version or the more complex sourdough route, you’ll discover that homemade grissini are incomparably better than anything you can buy.
The beauty of grissini lies in their versatility and the endless possibilities for customization. Once you’ve mastered the basic recipe, you can experiment with different flours (try whole wheat or spelt), various seasonings, and different shapes. Each batch becomes an opportunity for creativity and expression.
So gather your ingredients, clear your kitchen counter, and embark on this delicious Italian adventure. Your homemade grissini, crispy and fragrant from the oven, paired with delicious dips and good company, will create moments of simple joy that embody the very essence of Italian food culture: quality, simplicity, and pleasure. Buon appetito!
___________________________________________________________
For more inspiration and homemade goodness, visit our Pinterest page 🧡